Malvern Quilters
  • Home
  • Exhibition Information
  • Meeting Information
  • Programme
  • About Malvern Quilters
  • Exhibition 2022
  • Spring 2021 Meetings
    • Carols recommedations for zips and fabric
    • Books we like
  • SAMPLER QUILTS
  • Elephants for St Richard's Hospice
  • Ruby Rose Quilt
    • Ruby Anniversary Quilt
    • Edith Walk Photo Exhibition
  • For Sale
  • Useful Links
  • Contact Us
  • Events

What we learnt from each other


March 2021 Zoom Meeting. OUr Favourite Things
 
  • A Quilters Magic Wand - this can add a 1/4" seam allowance, particularly useful for Foundation Piecing work
  • Open ended needles - invaluable when sewing in all those ends
  • Pin cushion and quilters companion bag - great for keeping everything together and somewhere to put all the bits of thread you snip off.  
  • Magnetic pin holder - no more scrabbling around on the floor.
  • 1/4" needle guide - put your needle through the little hole and you can see exactly which line on your machine you need to follow to get an accurate 1/4" seam.
  • Curved seam maker and marker
  • Blunt ended scissors - great for pulling out ends of threads after you've used the seam ripper.
  • Shear snips instead of traditional scissors
  • Hedgehog clip storage - so much easier and tidier than a box
  • Embellishing machine for the serious embroiderer
Stack, Slash and Shuffle (or Whack and Stack) Technique

Irene used 6 x 10 inch squares. A layer cake is ideal for this. Remember, the number of cuts you make should be one less than the pieces of fabric and should leave you with, in this case, 6 shapes to shuffle.
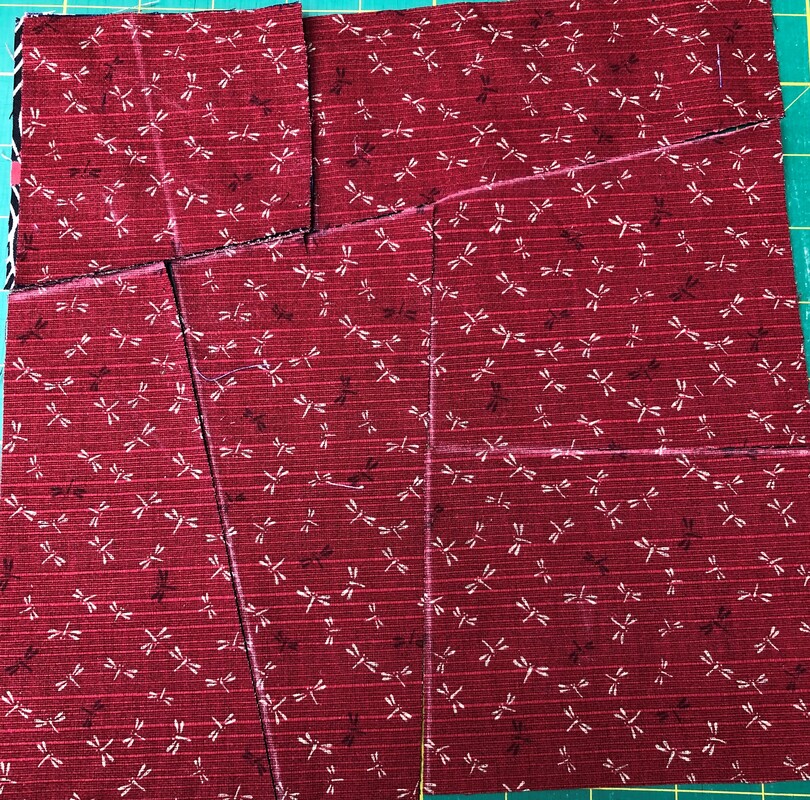
  1. Draw on your top square where you want to make your cuts. Everyone will be different and unique. Think how you can do this so you don't end up with awkard joins. when you reconstrust the square.  See photo 1.
  2. Make your cuts - also photo 1
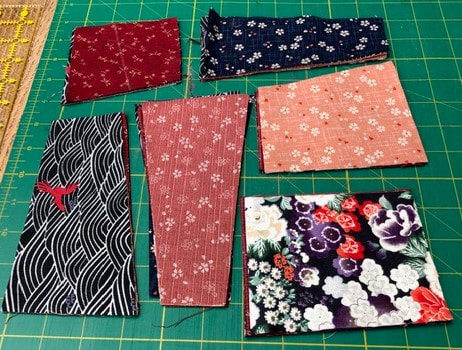
  3. Now stack. Leave pile 1 alone. On pile 2, move the top piece to the bottom. On pile 3 move the top 2 to the bottom,. Pile 4 - the top 3 to the bottom. Pile 5 - the top 4 to the bottom and on Pile 6 it's the top 5 to the bottom.  Label these!! You now have 6 piles with a different fabric on top. Photo 2
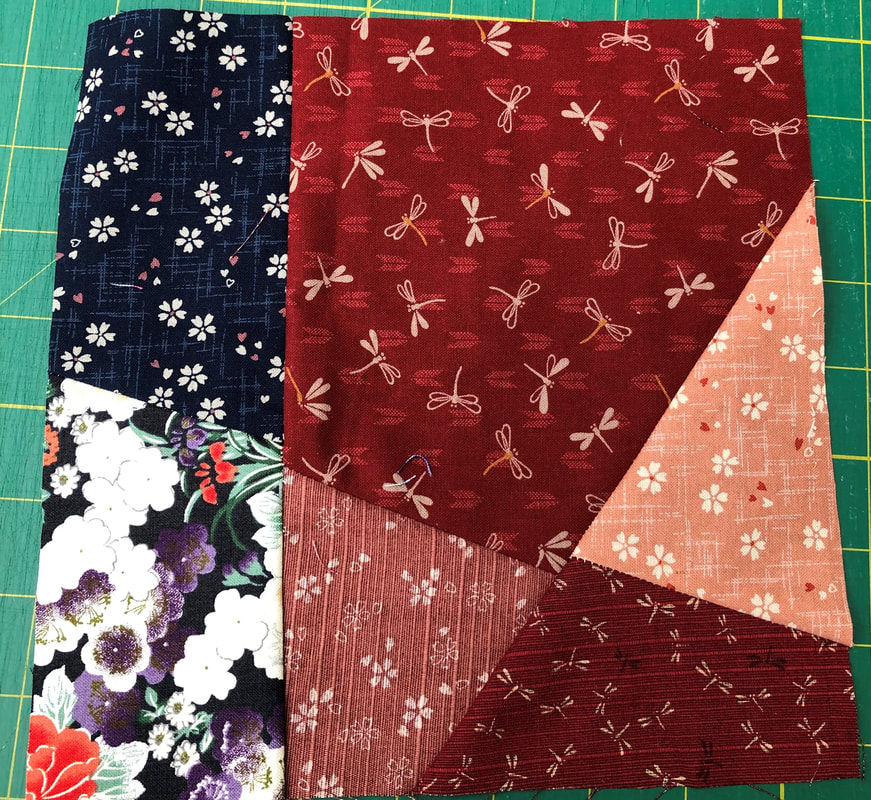
  4. Now sew it all back together. Your finished block will be smaller than 10 inches. See Photo 3.
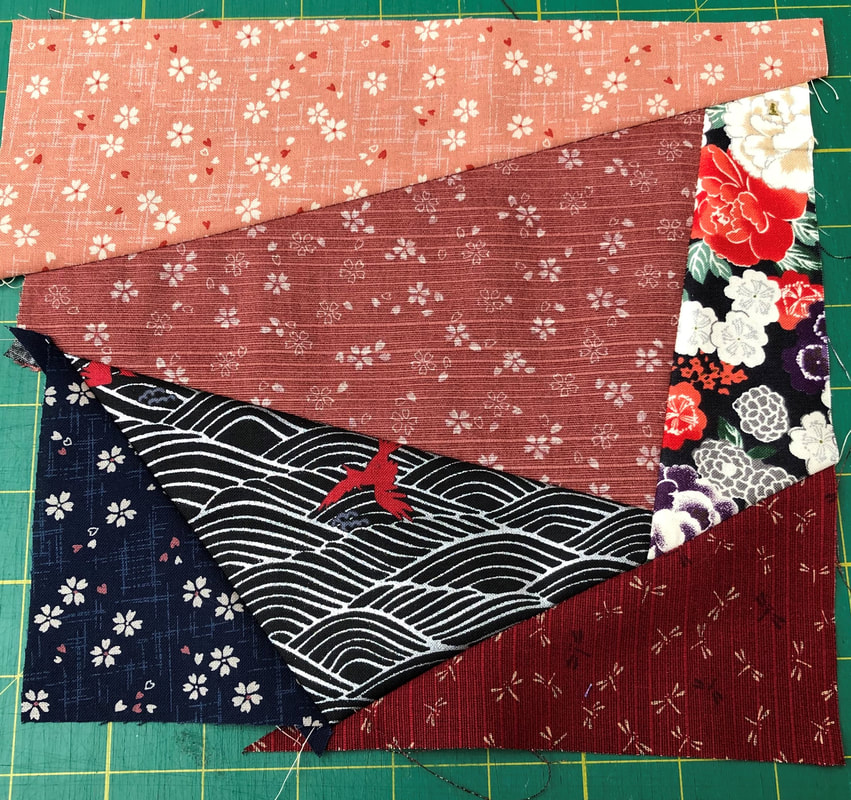
  5. Now square it up and arrange as you like. Photo 4
  6. If you want to make more than 6 blocks, making a pattern first is a good idea. Freezer paper can be useful here.
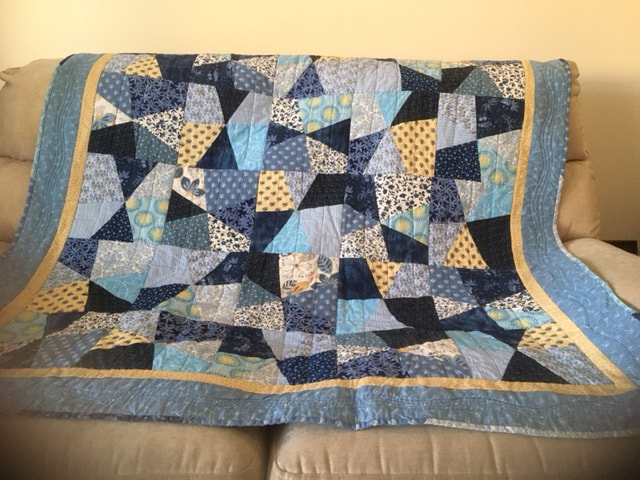
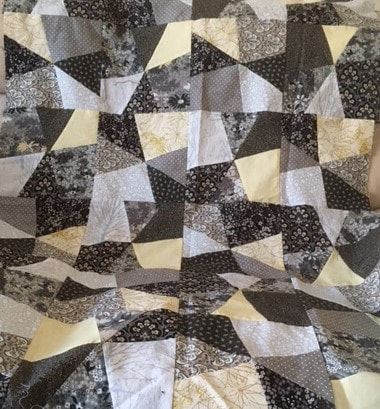
  7. Photos 5 and 6 show a couple of quilts, made using this technique.
Proudly powered by Weebly
  • Home
  • Exhibition Information
  • Meeting Information
  • Programme
  • About Malvern Quilters
  • Exhibition 2022
  • Spring 2021 Meetings
    • Carols recommedations for zips and fabric
    • Books we like
  • SAMPLER QUILTS
  • Elephants for St Richard's Hospice
  • Ruby Rose Quilt
    • Ruby Anniversary Quilt
    • Edith Walk Photo Exhibition
  • For Sale
  • Useful Links
  • Contact Us
  • Events